Developing a hosted web application isn’t just about writing code. It involves multiple moving parts, and if you’ve never been responsible for the full development stack and the process for your team, you might not fully grasp their value. But rest assured: now that you’re building your own company, you’ll want to involve these tools in your team’s process.
In almost all cases, I’d recommend setting up these tools the day you start development–but I also recognize it can be overwhelming and occasionally even counterproductive. Nobody wants to spend all of their time configuring tools, and if configuring half a dozen tools would kill your momentum, then put it off a bit and add them as time permits. (Figure 1)
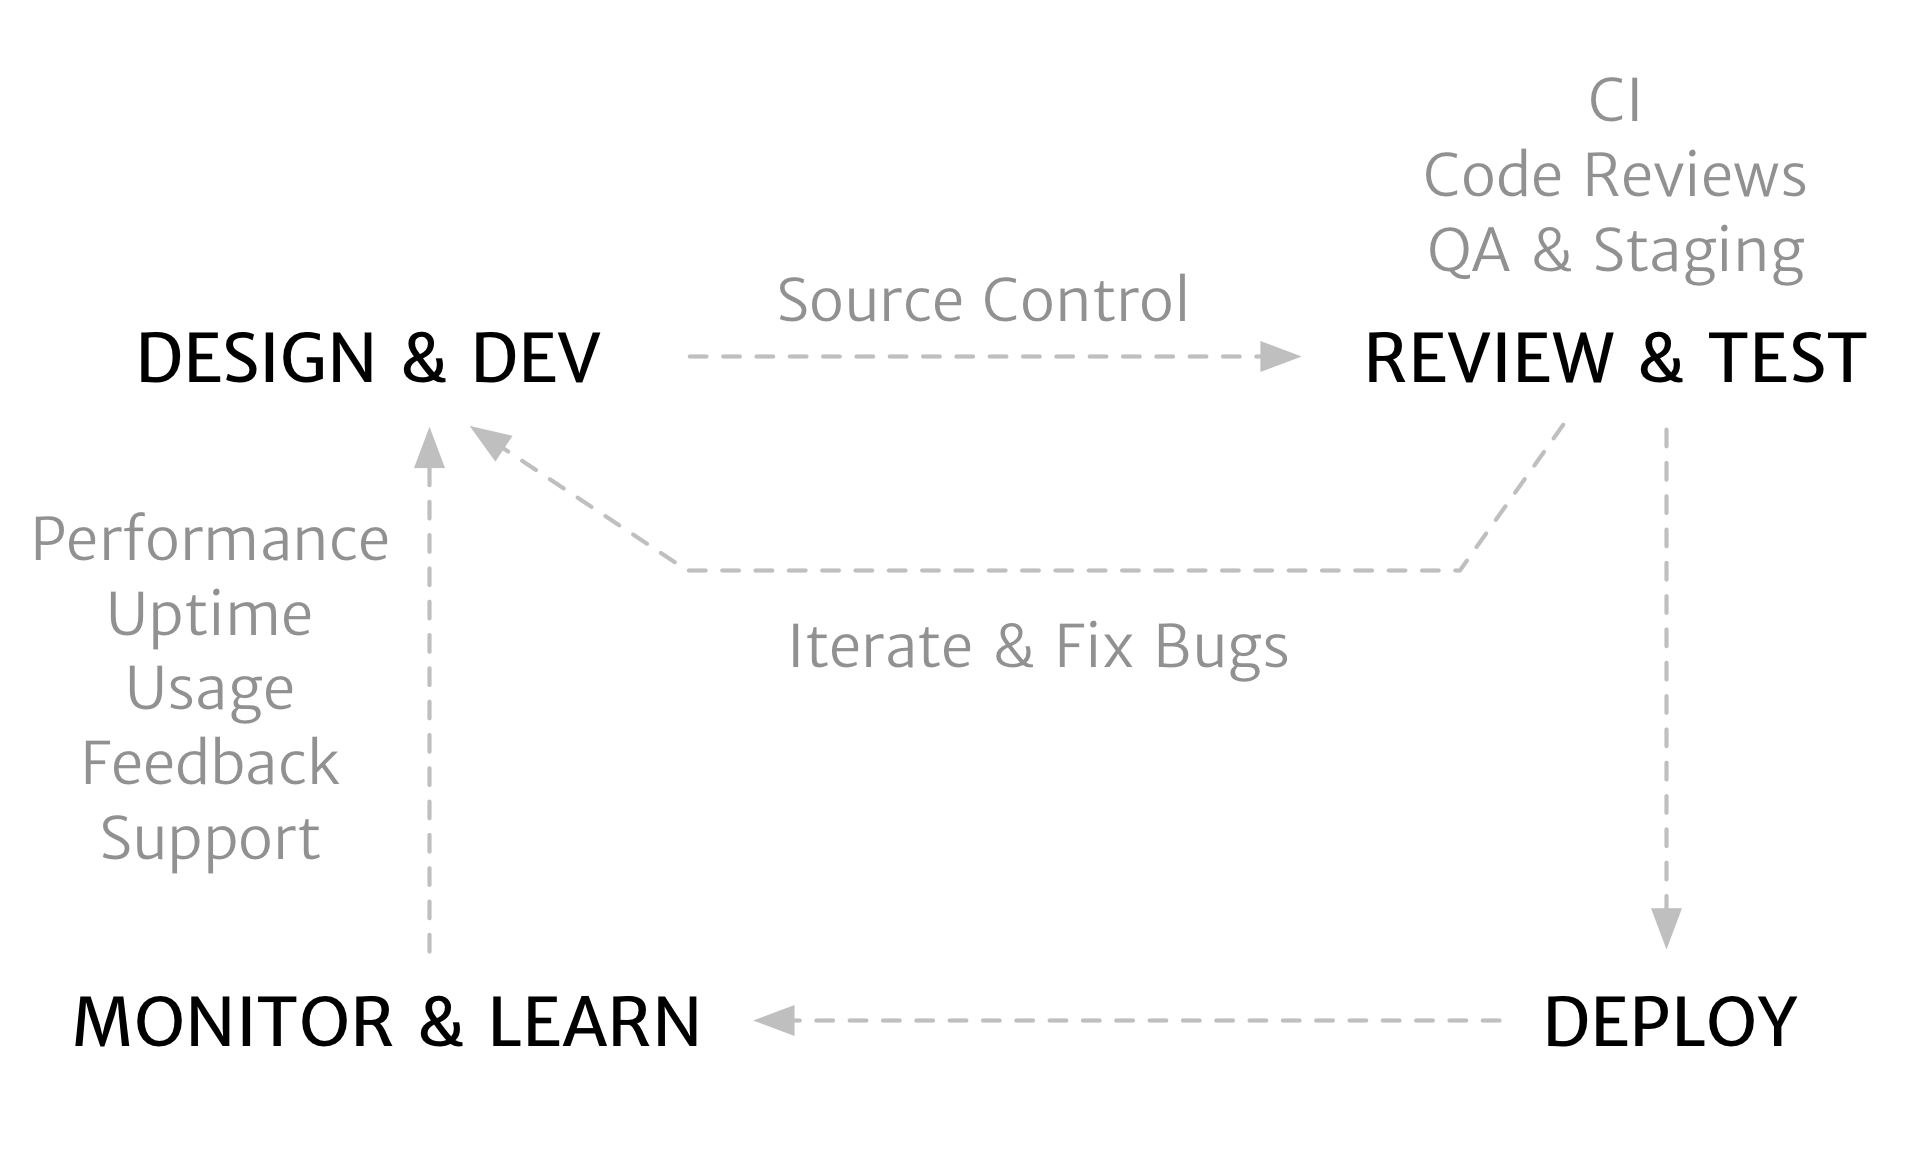
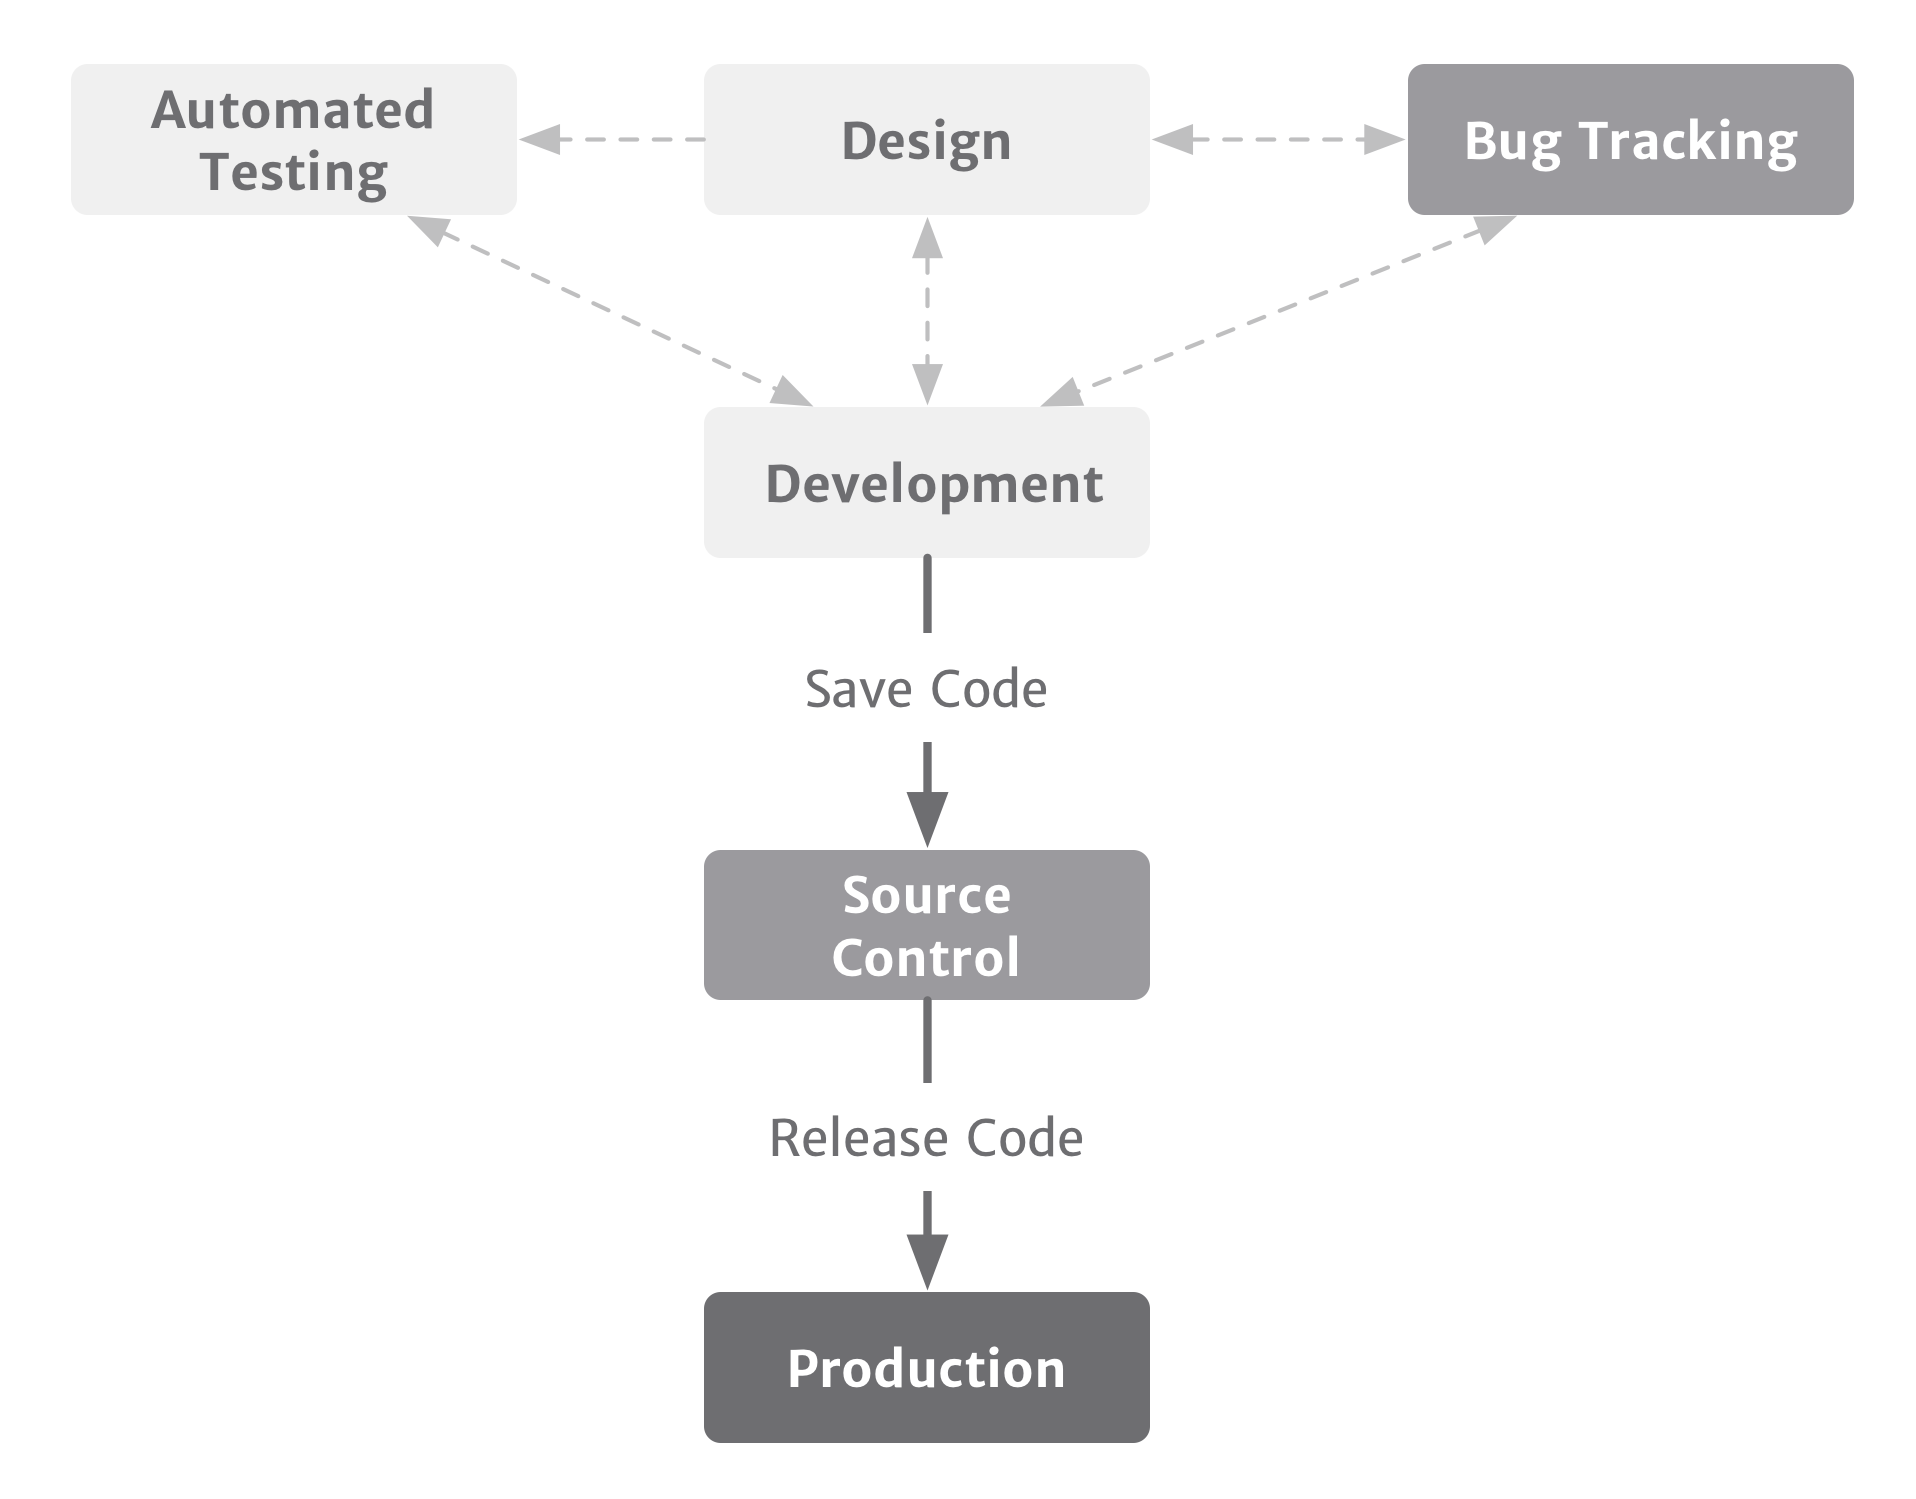
An overview of the software development life cycle.
↩︎Development is an ongoing process within a larger context; design and development are pieces of a larger feedback loop. The faster and more efficiently your team can navigate the feedback loop, the better your product can become. Choosing the right tools that complement your team, your product, and your process will help speed up that loop.
It may be tempting to think that your team is too small and agile to need some of these, but you’ll find it easier to create good habits if you start with them. Invest in good processes and tools up front, and you’ll see countless benefits down the road.
Environment Consistency
You have to eliminate any room for errors from configuration differences. Take the time to invest in consistent development, staging, and production environments. Whether this means using containers or even carefully maintained scripts, keeping your environments in sync for all developers and environments will improve your ability to try out new ideas with the confidence they’ll work consistently when you move them to production.
This means documenting every piece of software and current versions that your application relies on, in conjunction with detailed installation instructions. (It also means keeping that information current over time.) Even if you never hire another developer, there’s going to be a point where you have to set up a new laptop, and having clear documentation will keep you moving.
Source Control
This goes without saying, but most projects should be using source control. If you’ve only ever managed a hosted instance of a blogging platform, you may not have needed source control, since you simply updated your platform when they released new versions. But that won’t fly if you’re building a software company. Imagine what would happen if you were to lose all your source code, or if you were to completely botch a significant module. If code is your capital, then source control is your vault. It’s more than that, really, but let’s keep it simple.
Choosing your project’s source control system will probably be one of the first decisions that you make for your development process. Fortunately, there are quite a few capable systems for this with little setup involved. GitHub, Beanstalk, BitBucket, and GitLab are some of the more popular options these days. The challenge is to pick one that works well for you and your team. Many of your development tools will need to integrate with your source control system, so I’d suggest selecting a system that has extensive options to play nicely with your other tools. (Figure 2)
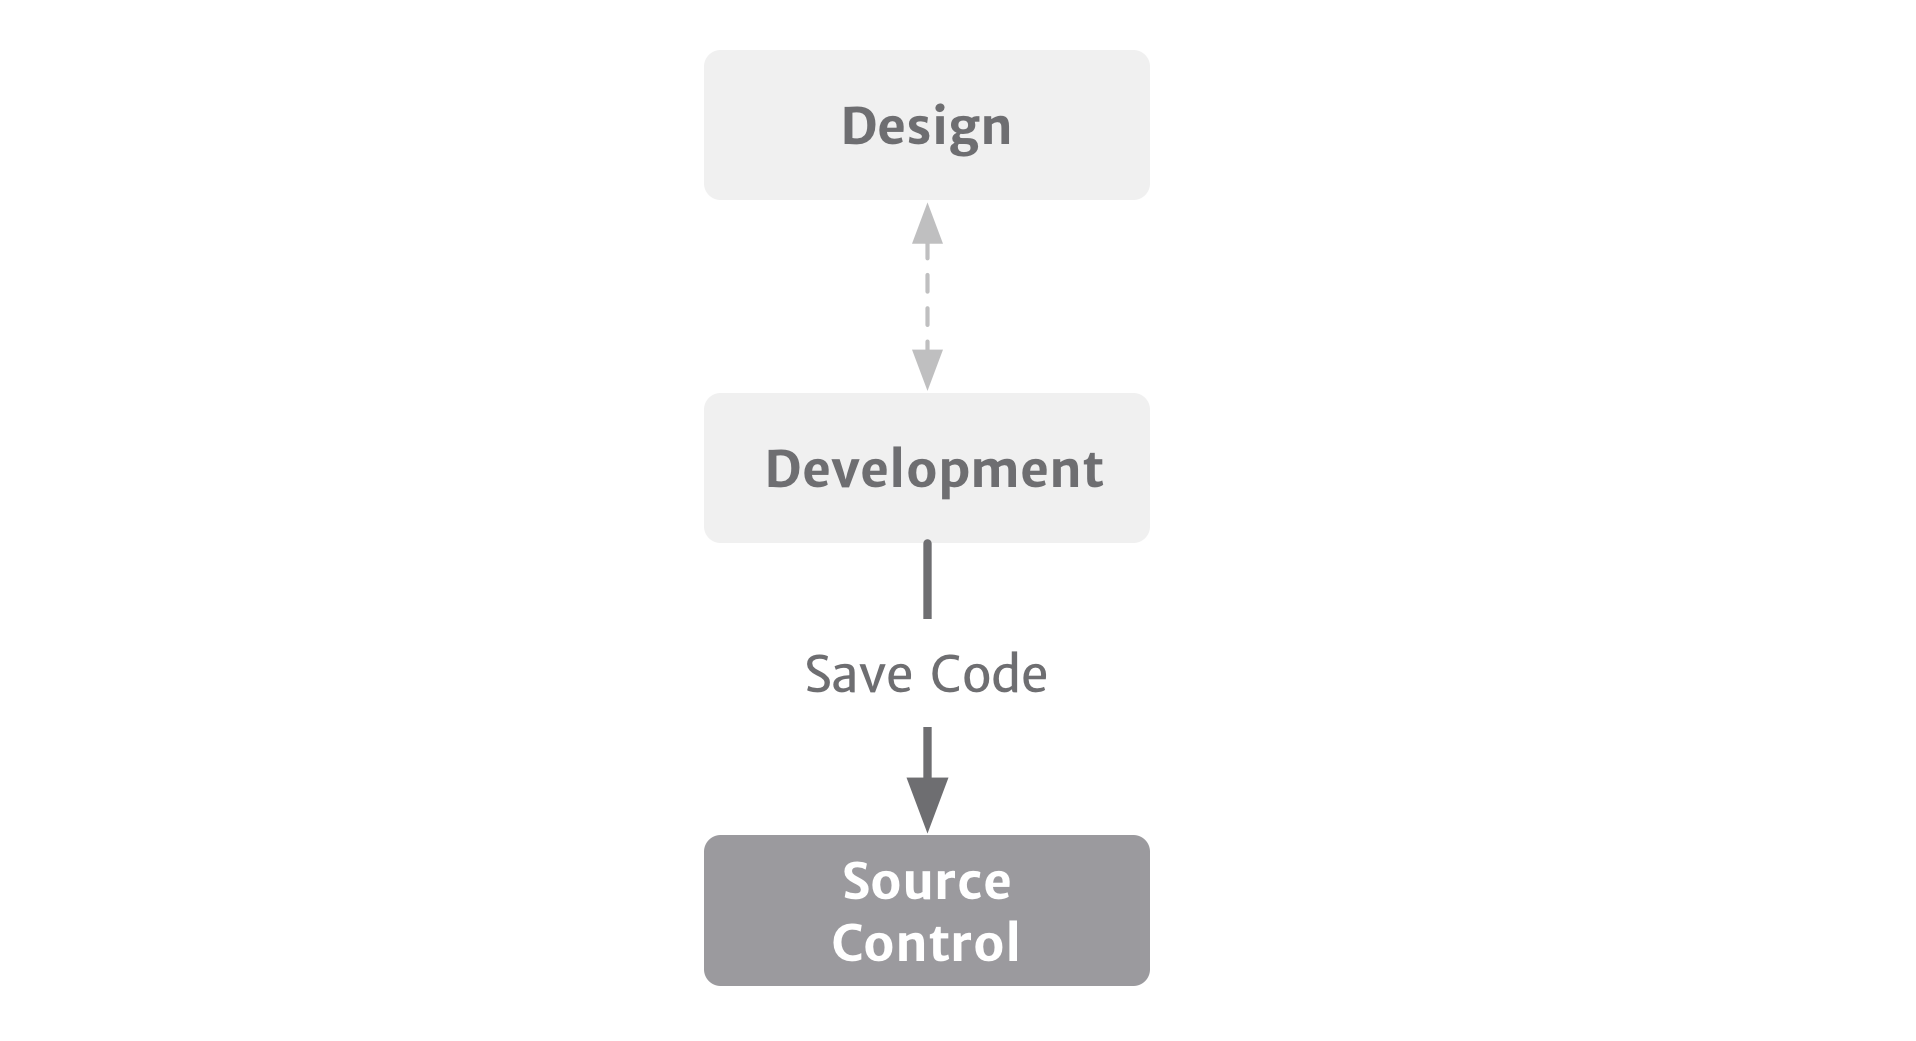
The core elements of any development process.
↩︎Release Automation
As as you start to write code, you’ll need to set up an environment you can regularly release updates to. While you may not want to share the application publicly, your release process will soon become one of the most important factors in determining how quickly and reliably you can release updates. The sooner you can incorporate a release process into your development, the easier it will be to extend it as your architecture expands. Getting a head start on your release process also lets you work out any kinks before you open your beta or launch your site.
One of the most significant benefits of a release process is that it forces you to think in terms of shipping. If it’s the end of the first day–or the end of the first week–and you’re already thinking about releasing a stable version of your application, you’re on the right track.
The main goal of release automation is to be able to deploy code and update your application with a single command. You may have additional commands for manipulating your servers, but if you have to manually intervene in your release process, you’re creating long-term problems. Start running releases as soon as you have a codebase, and stay on top of your release process. (Figure 3)
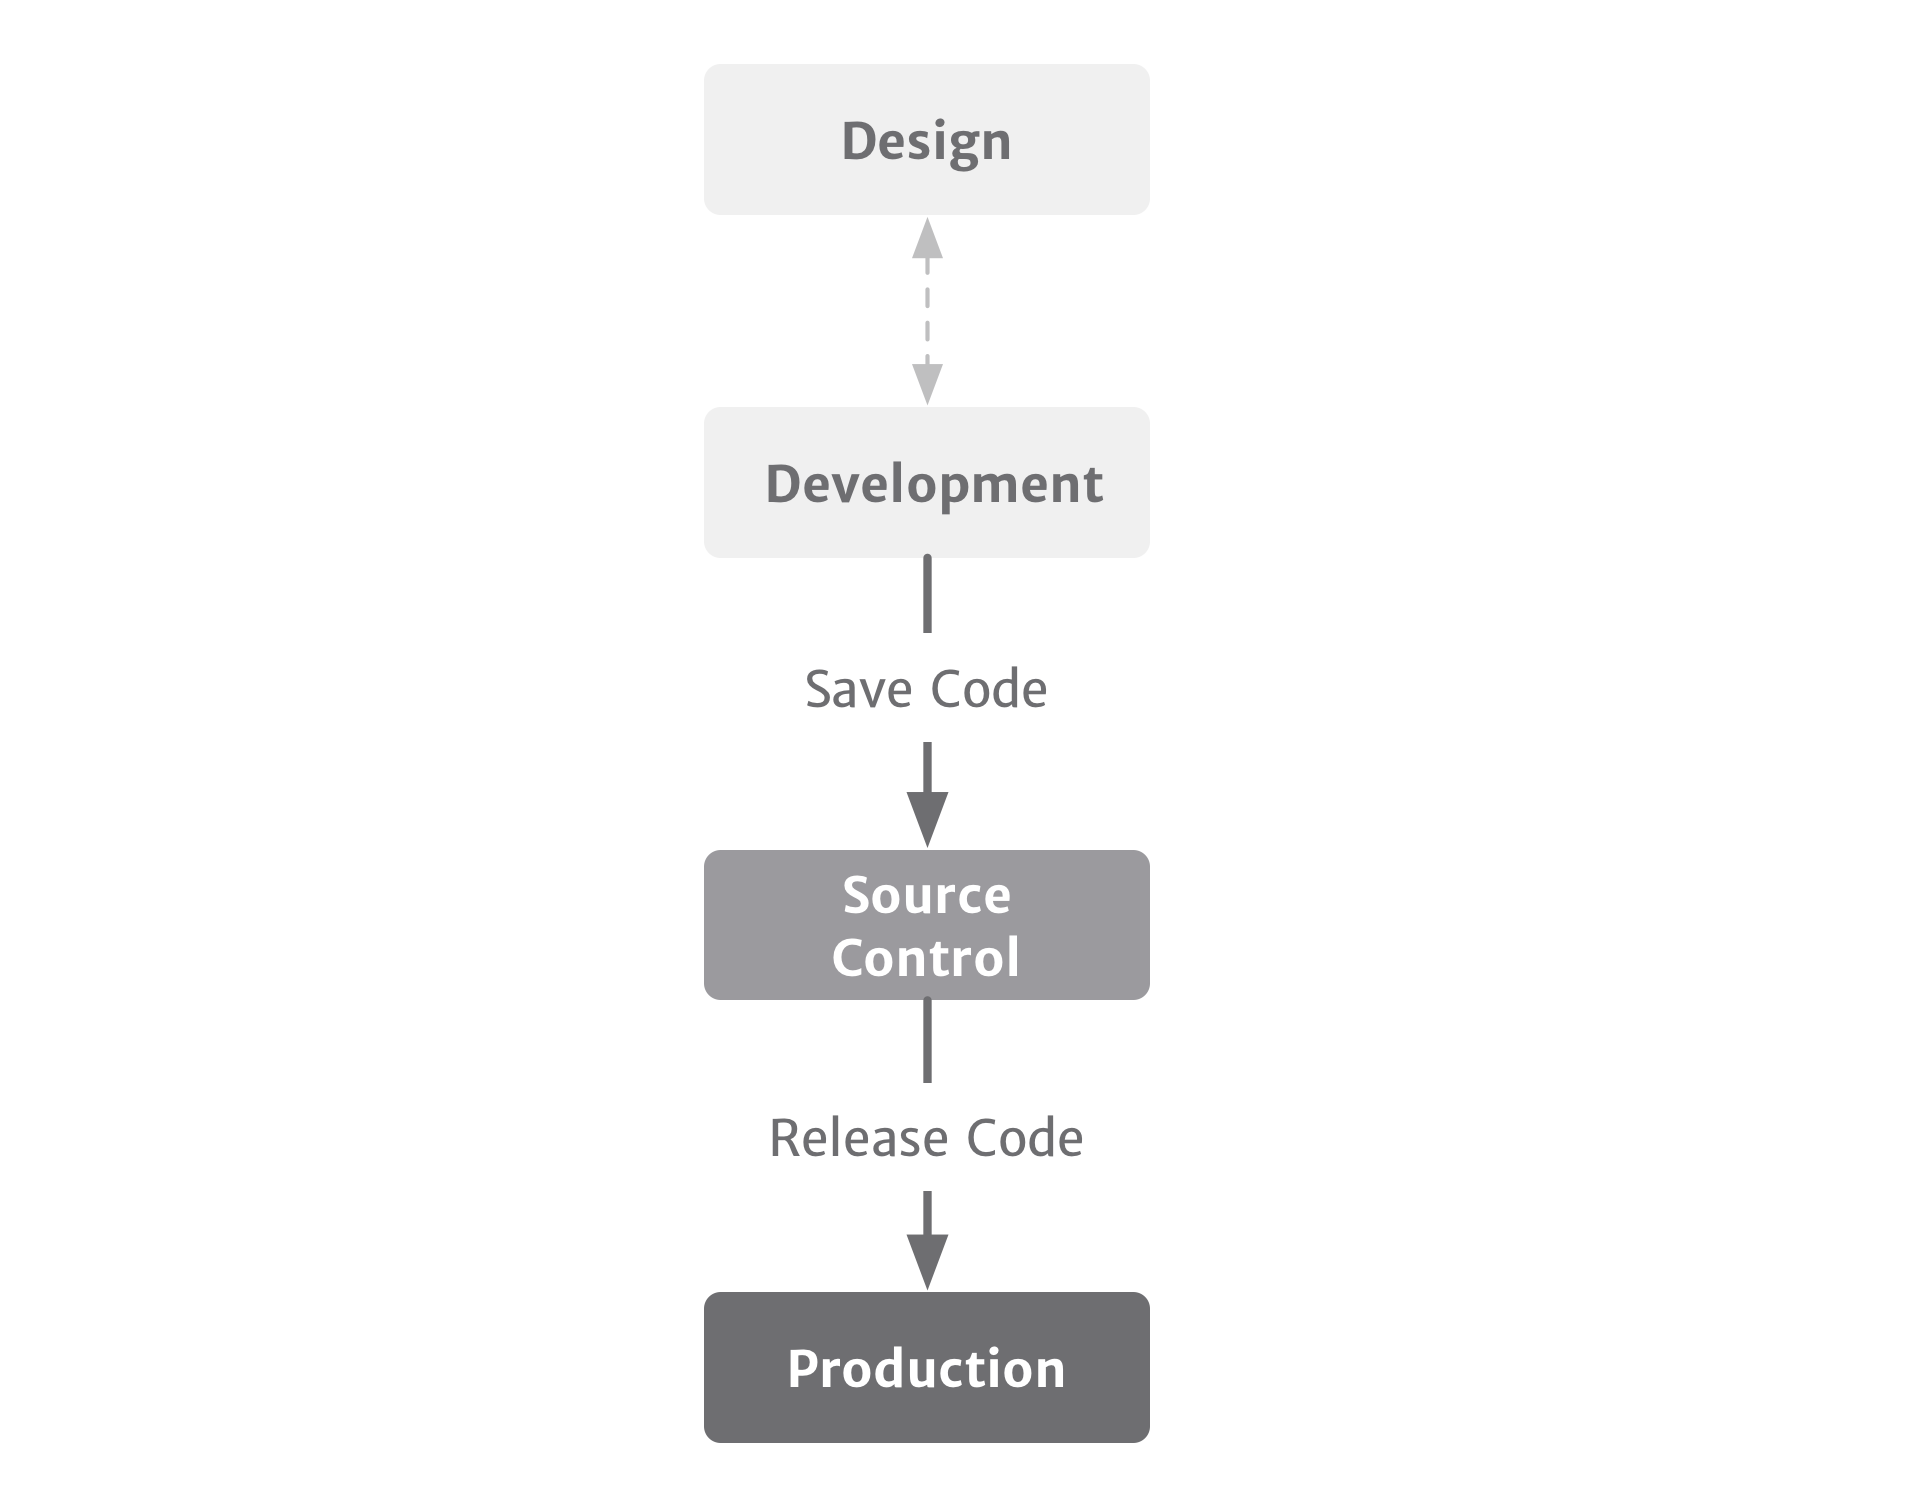
Once you have a production environment, you’ll need a process to release new updates.
↩︎Automated Testing
You might have heard people refer to “unit tests” or “specs”; these are forms of automated testing. Automated testing can be a touchy topic. On one hand, you’ll have some people who insist you’re building software, not a test suite. On the other hand, some folks will insist you need to write a failing test before you’re allowed to write working code. Wherever you fall on this spectrum, I’d strongly recommend that you use automated testing.
I had never written a unit test before I started working on Sifter, so I had to learn as I went along. When we launched, Sifter had about 55% coverage, which means our test suite ran tests against 55% of our codebase. We became much more serious about our test suite over time, and we managed to increase our coverage to around 82%. If I could go back and change one thing, I would spend more time on unit tests in those early days. Unit testing not only increased the quality of Sifter, but it also played a part in helping me write better code.
Your testing framework will depend on the language and development framework you choose. If automated testing isn’t your strong suit, I’d recommend setting aside some time to work on that–the benefits are immense. But whatever you do, don’t neglect it entirely. Your ability to rapidly evolve and improve your application could be held back if you’re not confident your new code isn’t breaking existing functionality. (Figure 4)
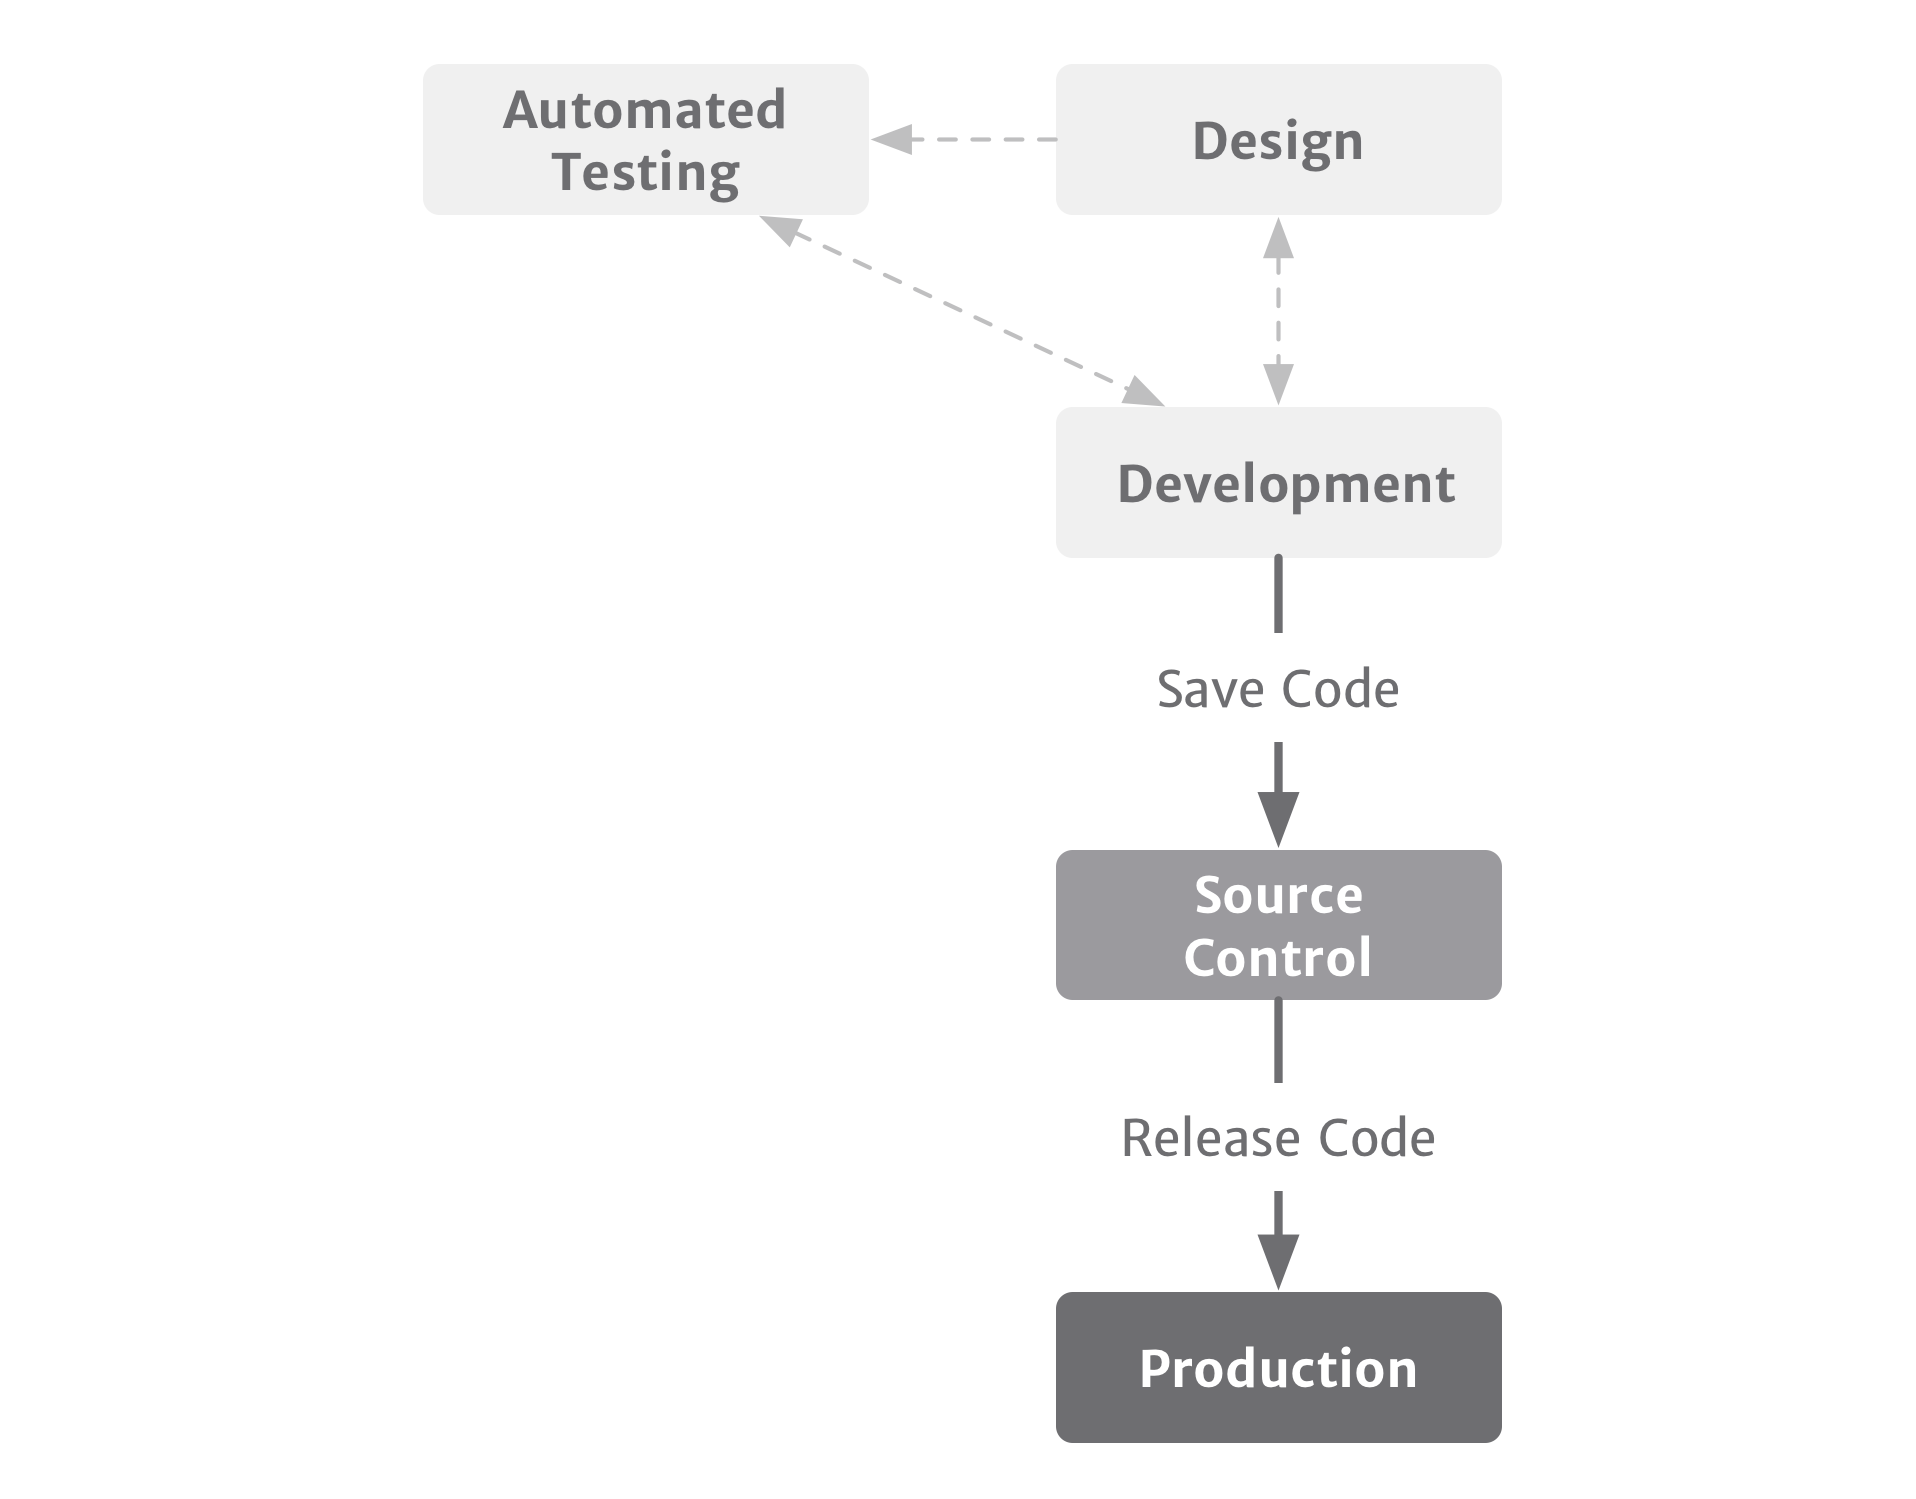
Automated testing will marginally slow your development at first, but over the long run it’ll dramatically improve the speed at which you can make changes and improve your code.
↩︎Bug and Issue Tracking
You’ll probably need to set up a formal bug and issue tracking process. Let’s face it: software will have bugs. You can’t prevent them, but you can do your best to handle them. Plus, you’ll invariably have other problems and issues that aren’t necessarily bugs but still require attention. You’ll want a bug tracker to make sure those problems don’t slip through the cracks.
There are several approaches to bug and issue tracking, and the one you choose will depend on the size of your team, the technology you’re using, your personal preference, and the project’s technical complexity. Whichever approach you choose, the important part is to make sure your bugs are captured and tracked in a central, shared location. Some teams try to use spreadsheets or email to keep track of bugs, but these inevitably break down. I could write about this topic in absurd detail, since Sifter is itself a bug and issue tracking system, but I’ll keep it short: just make sure you have a system in place. (Figure 5)
Once you have a functioning prototype, your list of bugs, issues, and tasks is going to grow. This is the best time to add a bug tracking system so you can stay ahead of problems before they get out of control.
↩︎Continuous Integration
Unit tests only help if you’re running them. You can set up tools to monitor and test your code while you write it, but you’ll probably also want to set up a continuous integration (CI) environment. With CI, whenever you update your source control system with new code, your continuous integration server will immediately see the change and start running your tests against the updated code. You may have heard teams talking about “breaking the build”–sometimes even having fines or penalties–if someone updates code in the source control system and their continuous integration environment reveals that it fails their test suite. Fortunately, like source control, there are quite a few great new tools like Travis CI, Jenkins, and CircleCI that can handle continuous integration for you with minimal setup. (Figure 6)
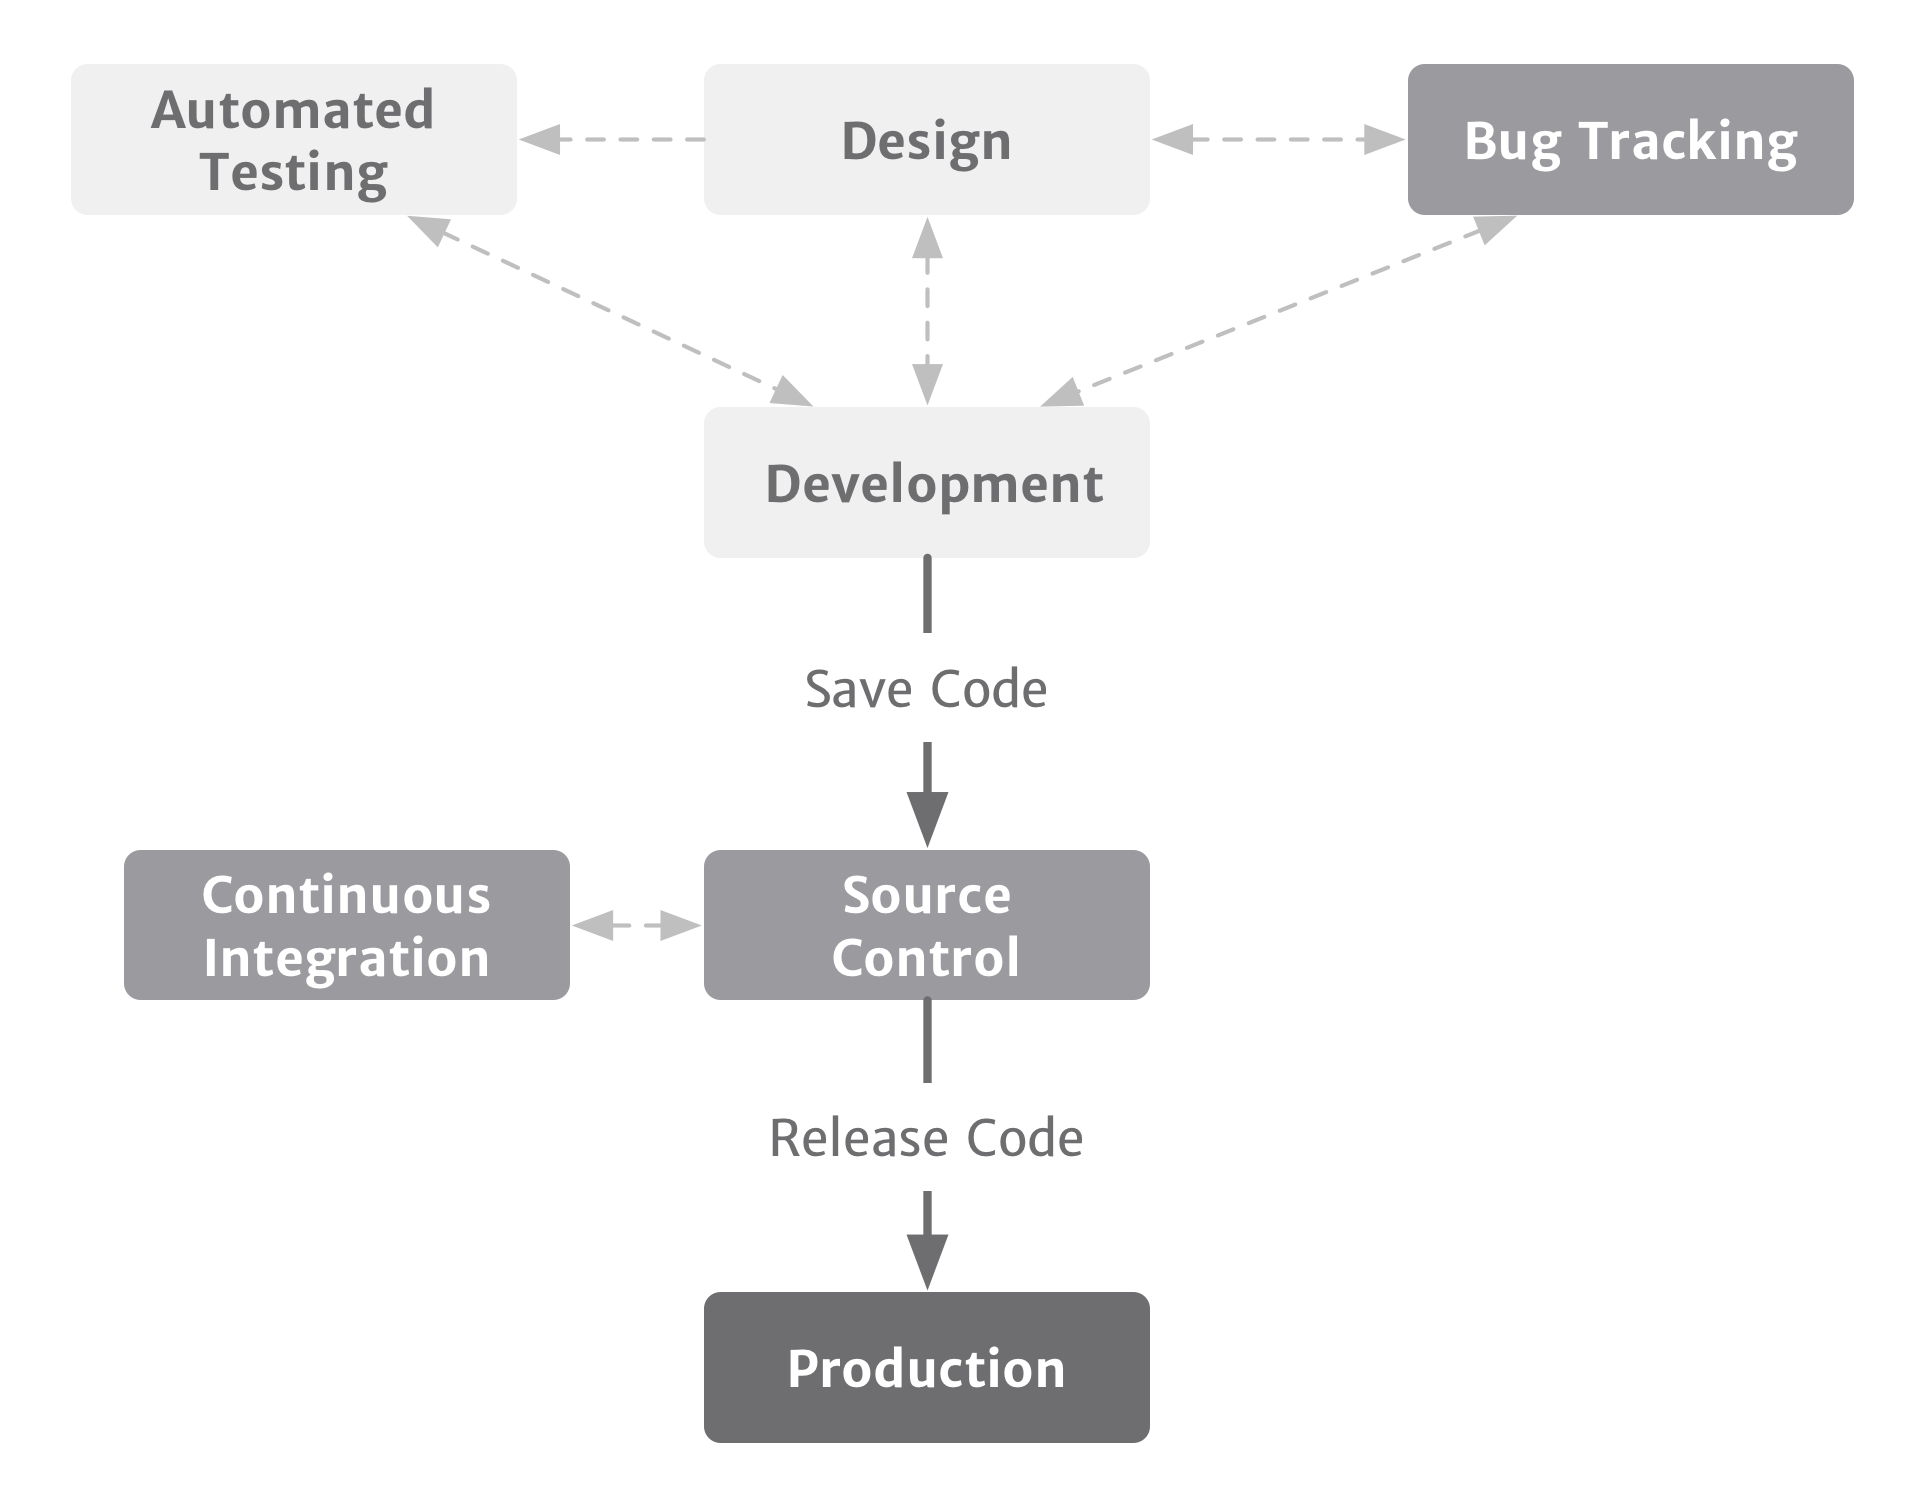
Continuous integration builds on your automated testing by regularly ensuring your codebase passes all of your tests. Think if it as a smoke alarm for your application.
↩︎Code Reviews and Code Quality
Make sure your team members review one another’s code. It may be tempting to skip this process when you’re in startup mode, but it has several significant benefits. First, it ensures you’re shipping higher-quality code. Second, it serves as an amazing educational opportunity for team members. Finally, it helps make sure that no one is the sole possessor of knowledge for any one area of your application. You don’t need everyone to be an expert on everything, but you don’t want to be in a situation where one of the founders decides to move on and you discover that no one knows their area of the application.
Many source control systems make it easy to review code–formally or informally–by commenting on the code in a web interface. There are several automated tools available to help test for code quality and even to look for security holes. With Sifter, we used Code Climate. If Code Climate doesn’t support your language or framework, there are likely similar tools for your stack. The important thing is to lean on these tools to automate the more pedantic part of your code reviews. The amount of time it will save you is priceless. (Figure 7)
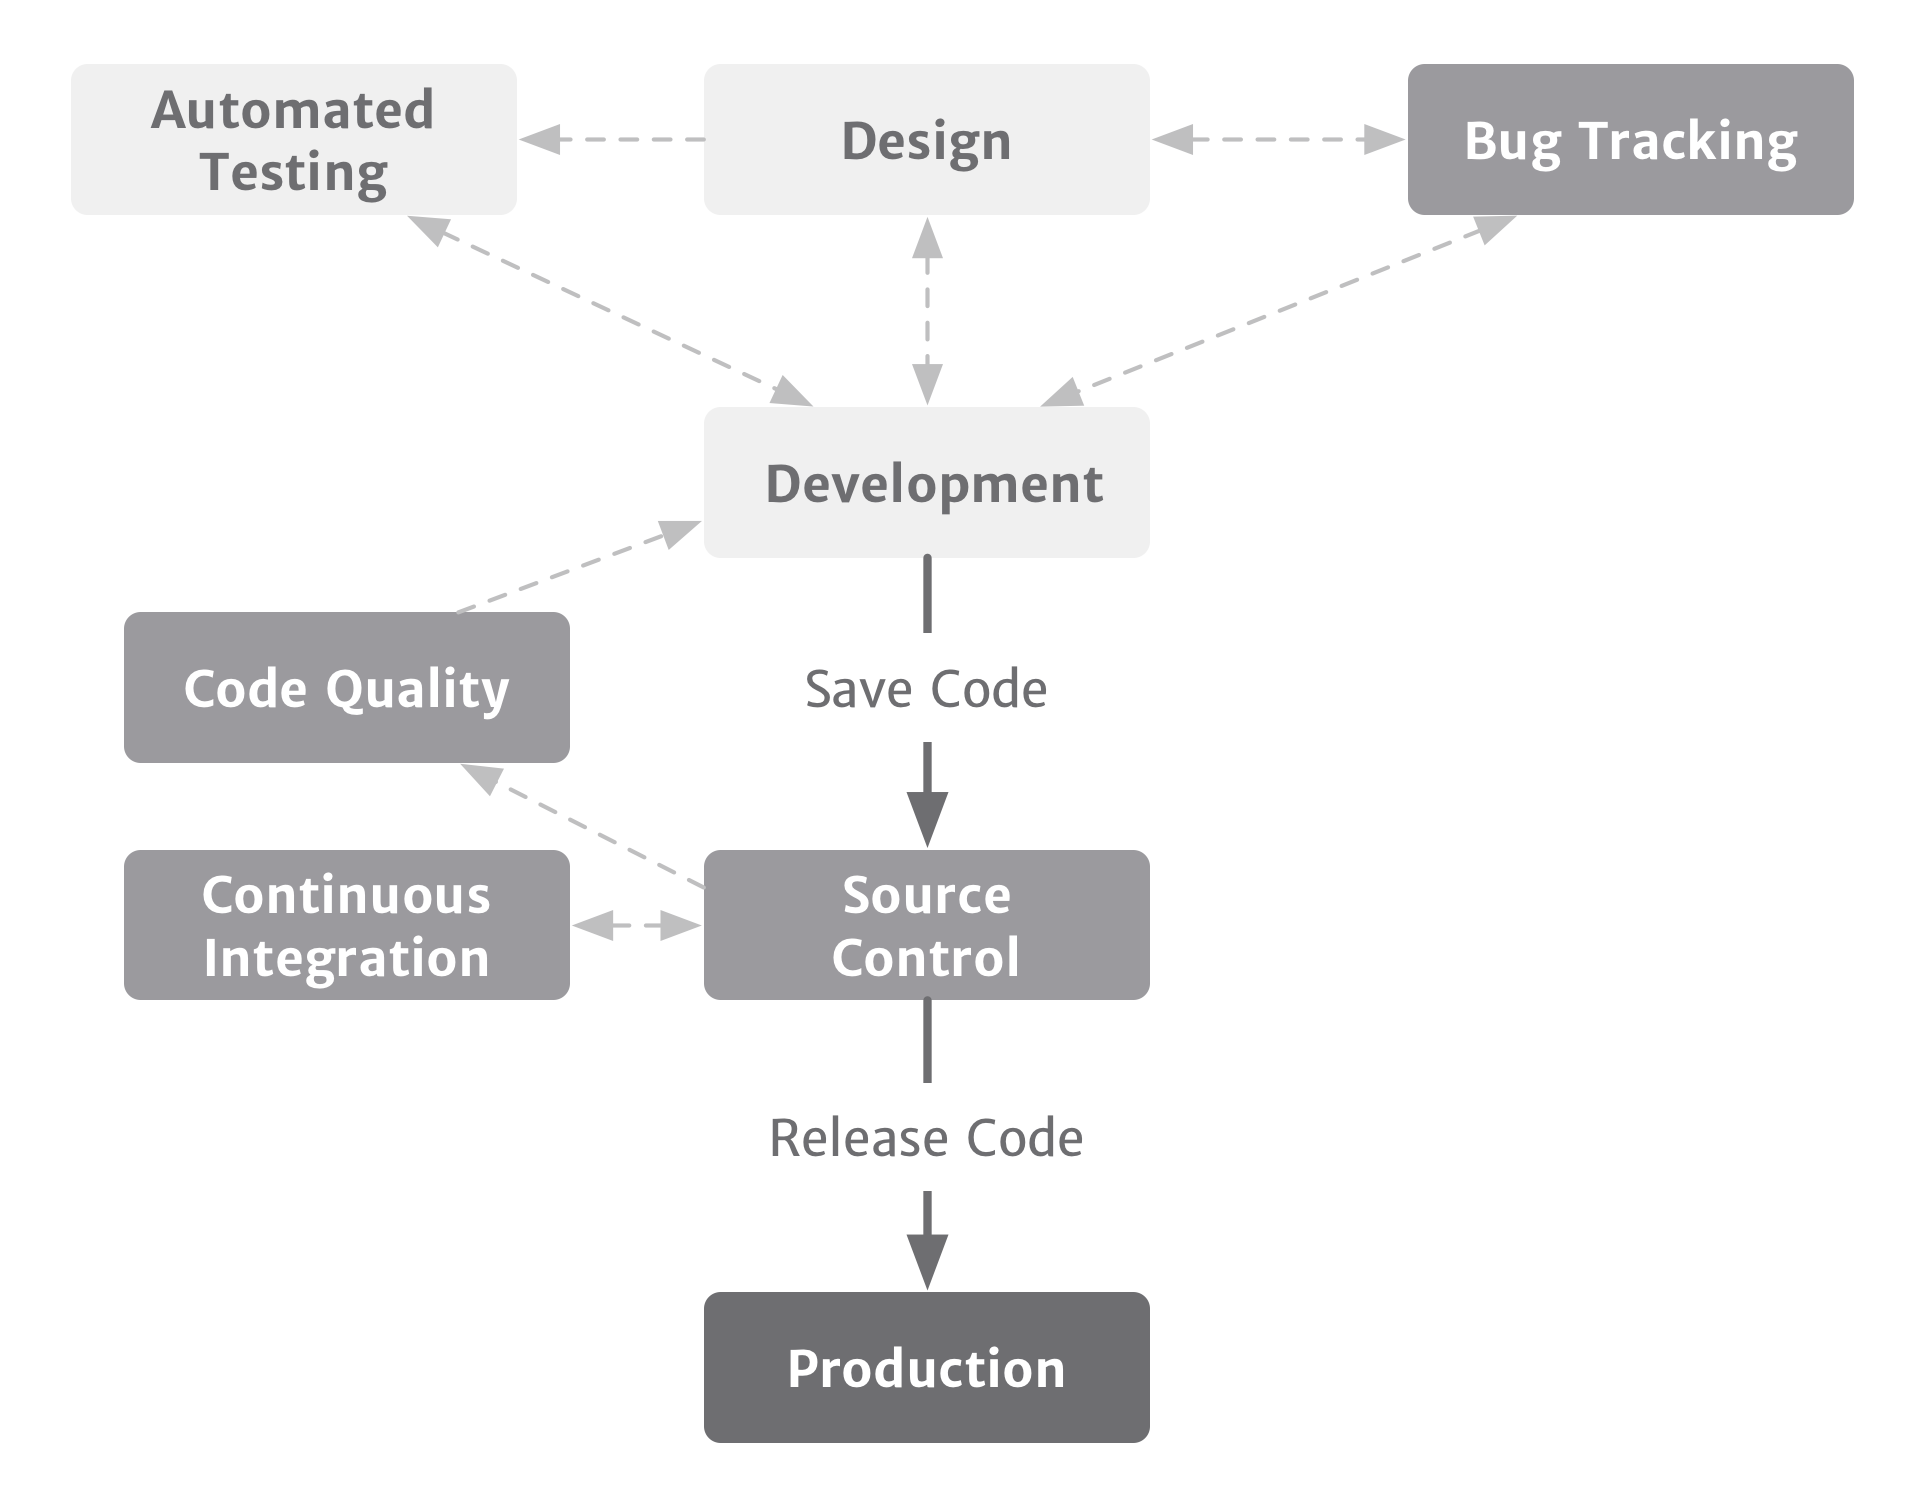
In addition to automated testing and bug tracking, adding code reviews and automated code quality checking to your development feedback process is priceless.
↩︎Release Management and Environments
Writing code isn’t enough. You also need to get your code onto your servers. Enter release management and automation. It’s easy to have an informal process in place when you have a small team, but if things start slipping through the cracks–or if releases aren’t running smoothly–you should invest some time toward improving your process.
Release management includes your continuous integration environment and your scripts for releasing new code. It’s also worth setting up additional environments for testing your code, such as staging and quality assurance (QA) in addition to production. These additional environments should mirror your production environment as closely as possible. If your production site uses SSL, then they should too. If your production site is behind a load balancer, then maybe they should be as well. Similarly, they should run the same web server, application server, database, and any other software your application relies on. Fortunately, if you’re managing your servers with the right tools–which we’ll cover in the next chapter–this will all be fairly straightforward.
As well as staging versions of your servers, you’ll probably also need to set up staging versions of your vendor accounts. For instance, if you have an external provider for your transactional email, you should have accounts with them for staging and production. This ensures that production and staging data aren’t co-mingled, and it makes it much easier to troubleshoot when the time comes.
A staging environment serves two major purposes. First, it creates a shared environment where team members can test their code against a consistent representation of your application. This gives you a predictable and reliable version of your application that helps minimize the “works for me” problem. Second, it creates a production-like environment for testing any features that may work slightly differently in a production or staging setting than they would in a local development environment. This helps you detect any issues that might not otherwise be visible until you’ve released your code into production.
I can’t stress enough the benefits of a dedicated staging environment. Time and again we were able to detect small production issues earlier and fix them more easily because we had a staging environment. (Figure 8)
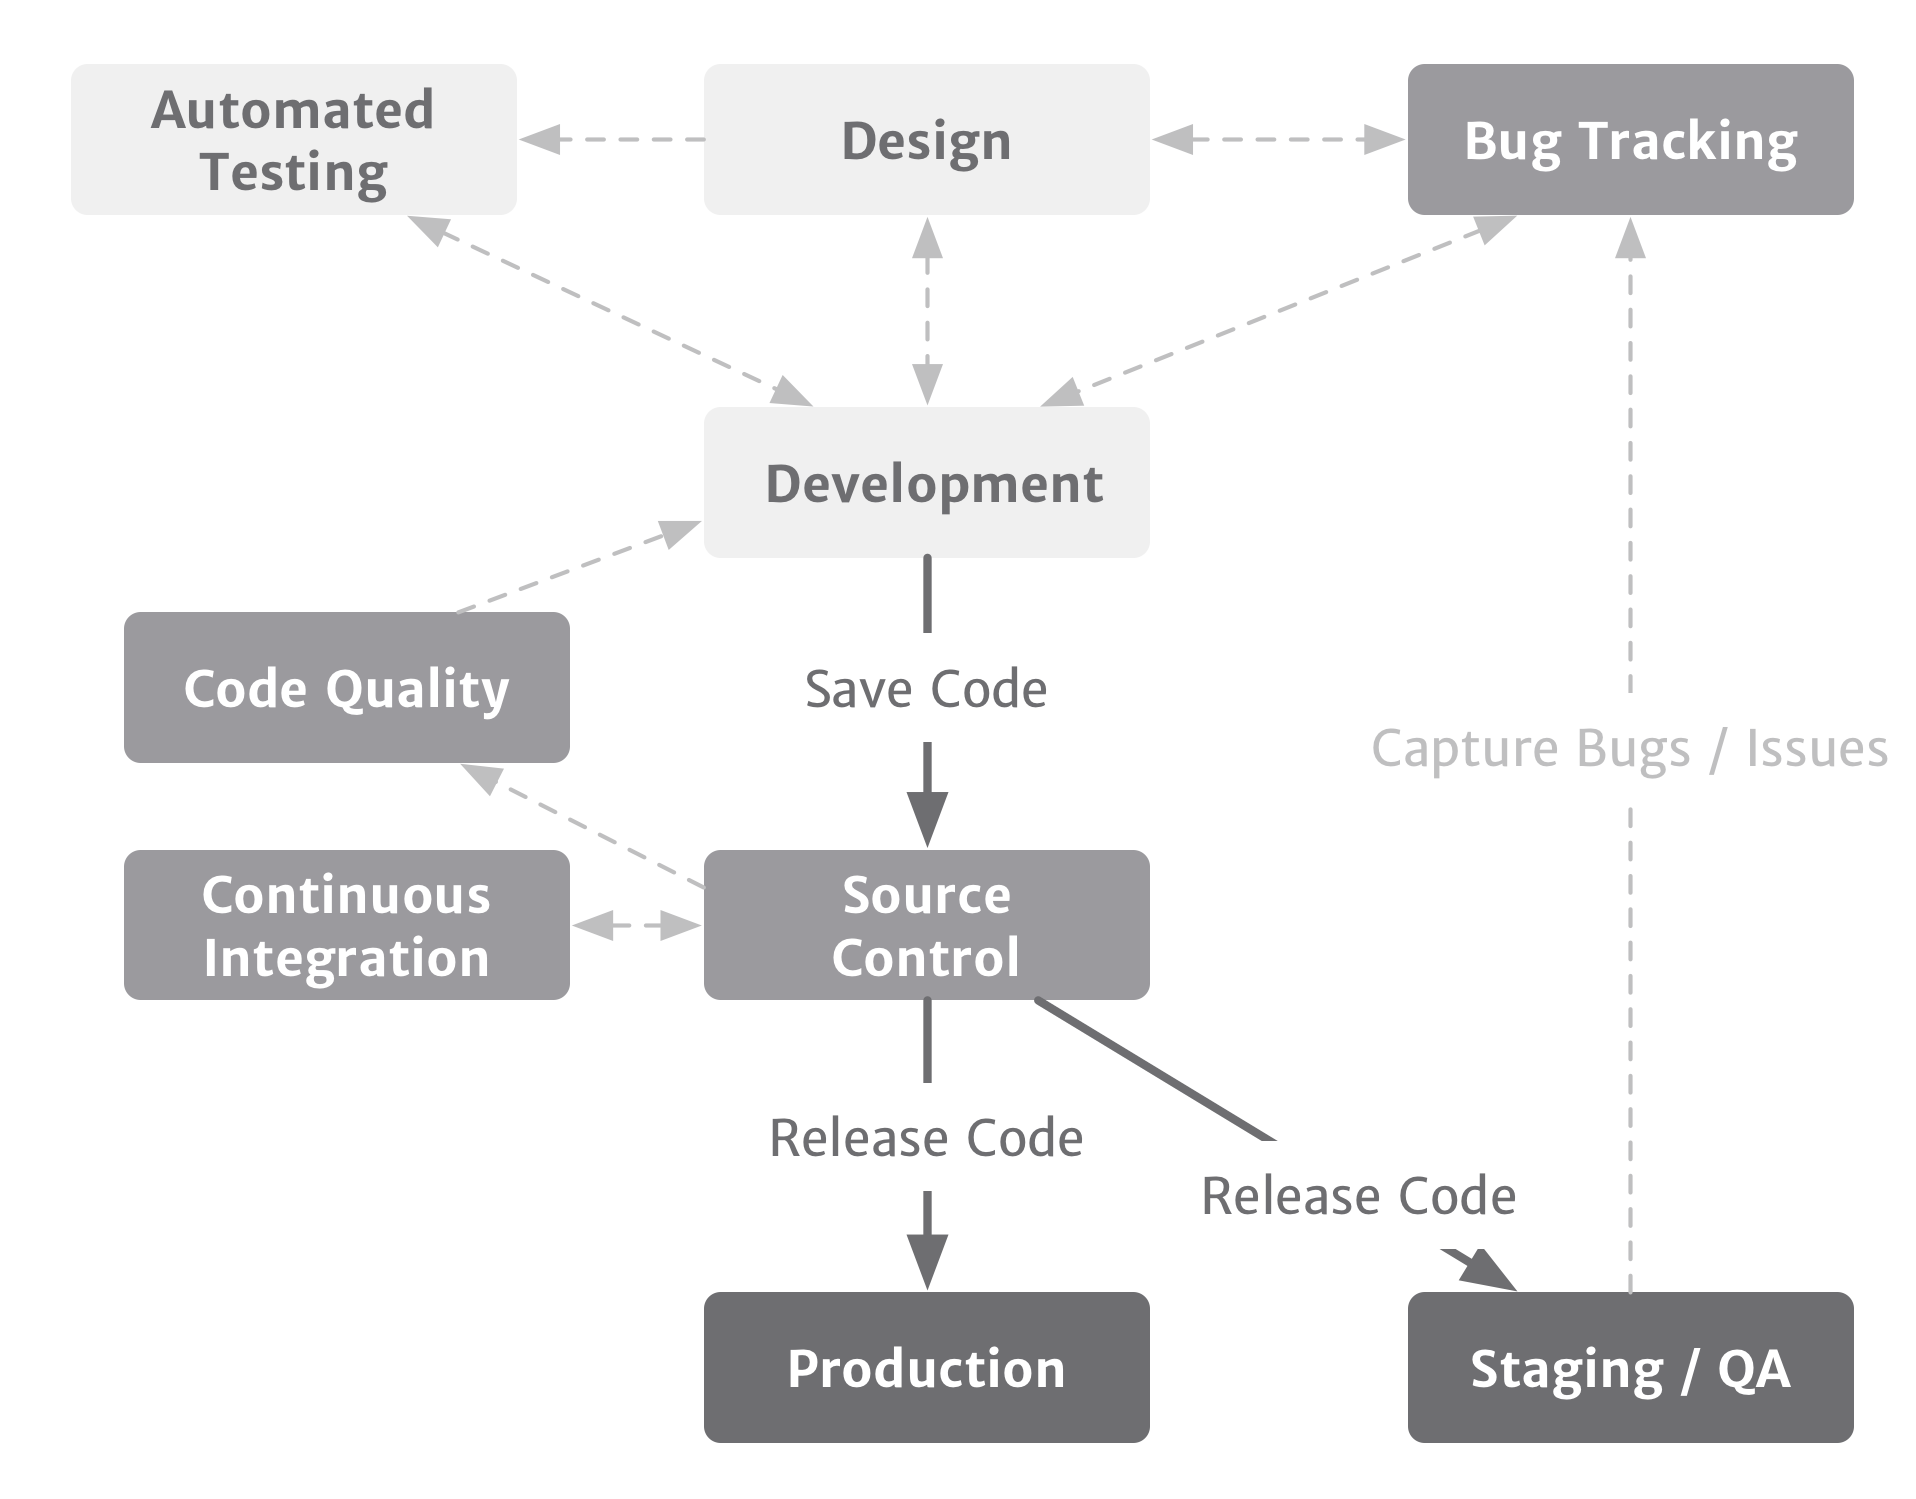
The final component of an ideal development process is maintaining some level of a staging or quality assurance environment–or both.
↩︎Creating a High-Quality Culture
Some of these might feel like overkill for a small team, but the earlier these habits form, the easier it is for them to adapt and grow sustainably. Investing in these tools today will save you hours of pain down the road.
I’ve worked with dozens of teams over the years, and I’ve seen countless processes. I think it’s no coincidence that the teams with the best development processes produced the highest-quality products and the most reliable results. The sooner these tools become part of your culture, the better off you’ll be.